Before starting
This website contain ads provided by an adnetwork, it means that redirections and misleading stuff will appear outside of my control. This exists because is a way to fund the website and keep it running for free. I would appreciate if you let ads run here.
If you want to use the website without ads, you can become a supporter, it's just 5$/month. If you don't want to pay, you can still use an adblock, but this will prevent some tools and options to be used.
No ads can harm you or your device, just don't download and execute stuff on your pc/phone, neither write your personal data anywhere.
AI Hentai Generation Tutorial
Welcome to the Hentai Generator tutorial! This guide will walk you through creating AI-generated hentai artwork with powerful tools. Basic generation is free and unlimited, with no account, tokens or credits needed. Follow these steps to bring your fantasies to life.
How to read this guide: tools and options are tagged so you know what you get:
Free works for everyone on the main page. Supporter is unlocked by becoming a supporter ($5/month). Locked tools on the main page show a golden "Supporter" ribbon and, when clicked, send you to the supporter page.
Inline help: almost every option in the app now has a small ⓘ icon next to it. Click it for a quick explanation right where you are, so you don't need to keep this tutorial open while generating.
1. Basic Generation
Click the GENERATE button on the main page to create your artwork.
2. Create Your Prompt
If you don't want it to be random, describe what you want in the text field. It's written in tags: "large breasts", "blue hair", divided by comma, it can work with free sentences as well: "a girl with large breasts and blue hair", but it may waste space where you could write more things. Be as detailed as possible for better results.
Writing Effective Prompts
The key to great AI art is in your prompt. Here's how to craft the perfect description:
Prompt Structure
Start with the main subject, then add details in order of importance:
- Character description (gender, hair, eyes, etc.)
- Clothing or lack thereof
- Pose and expression
- Background and setting
- Special effects or style
Example Prompts
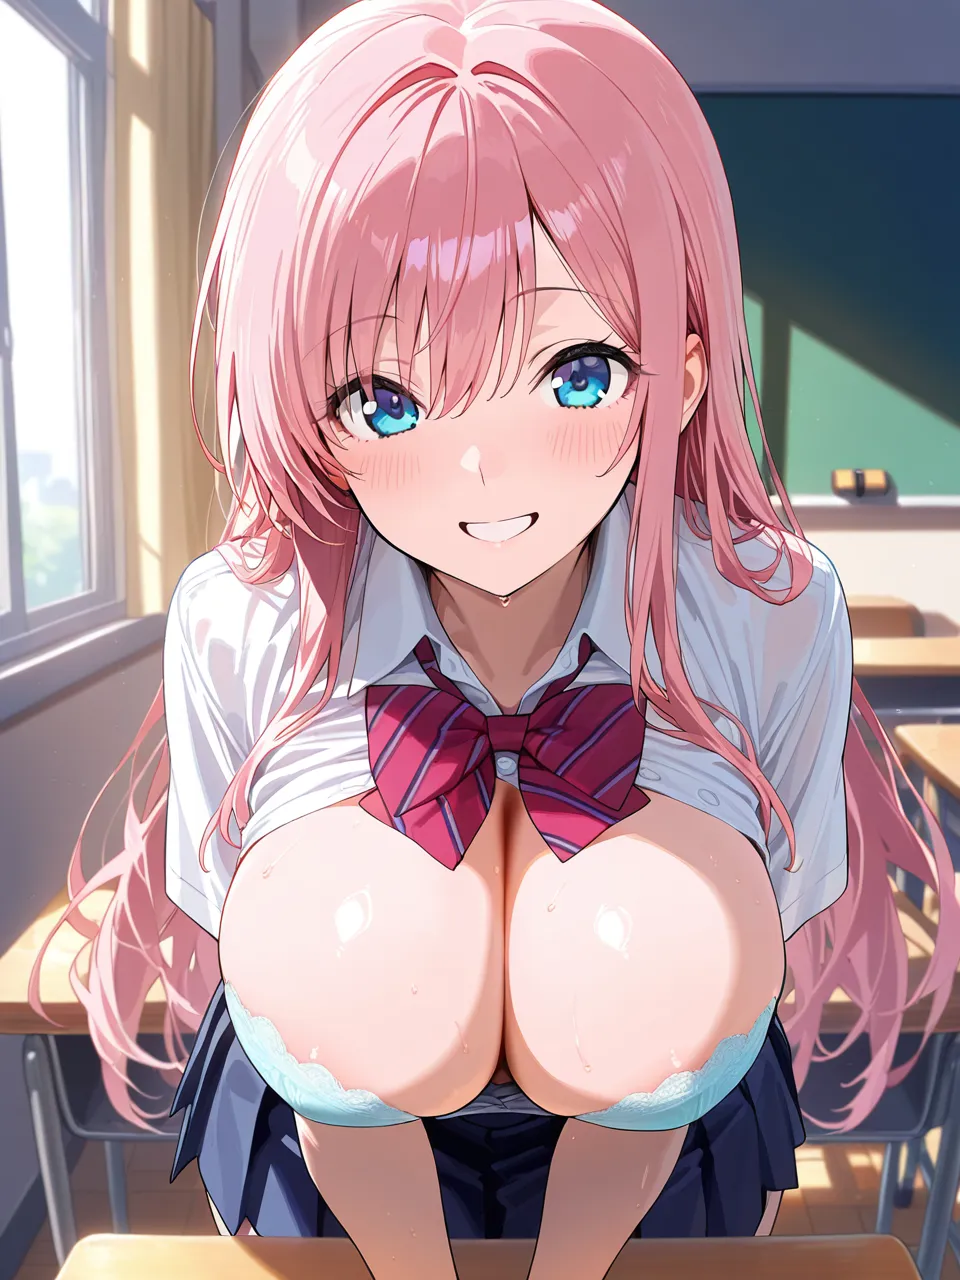
Basic Character
"1girl, long pink hair, blue eyes, large breasts, school uniform, smiling, classroom background"
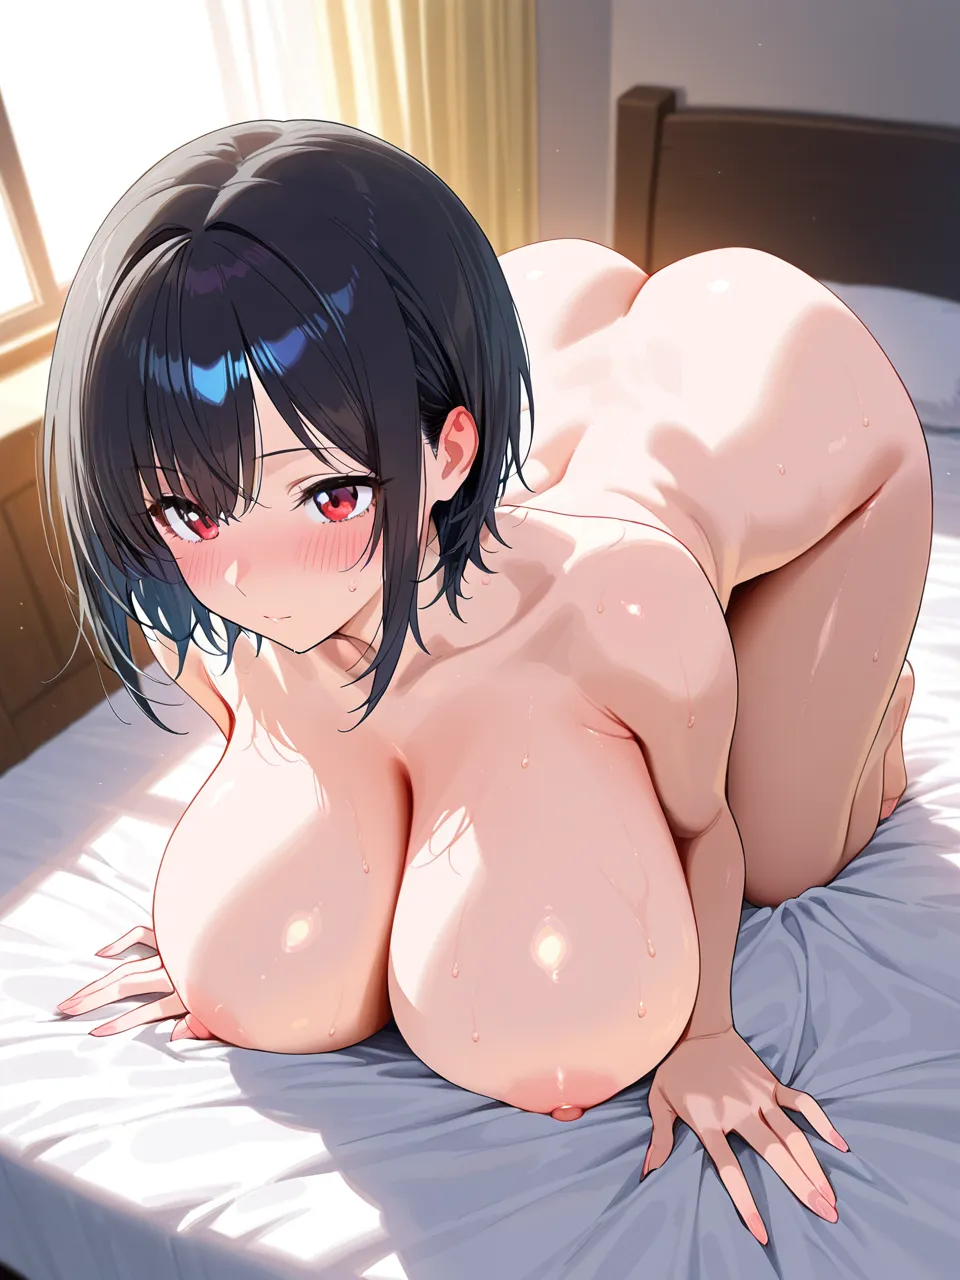
Detailed Scene
"1girl, short black hair, red eyes, large breasts, huge breasts, naked, bent over, blushing, bedroom setting, soft lighting, over a bed, trending image"
Character
"1girl, large breasts, (Raiden Shogun from Genshin Impact), purple hair, braids, yukata, exposed breasts, visible nipples, ((removing sword out of chest, summoning a sword on her chest)), clouds background, rainy day, raining, dark background, low lights, night time"
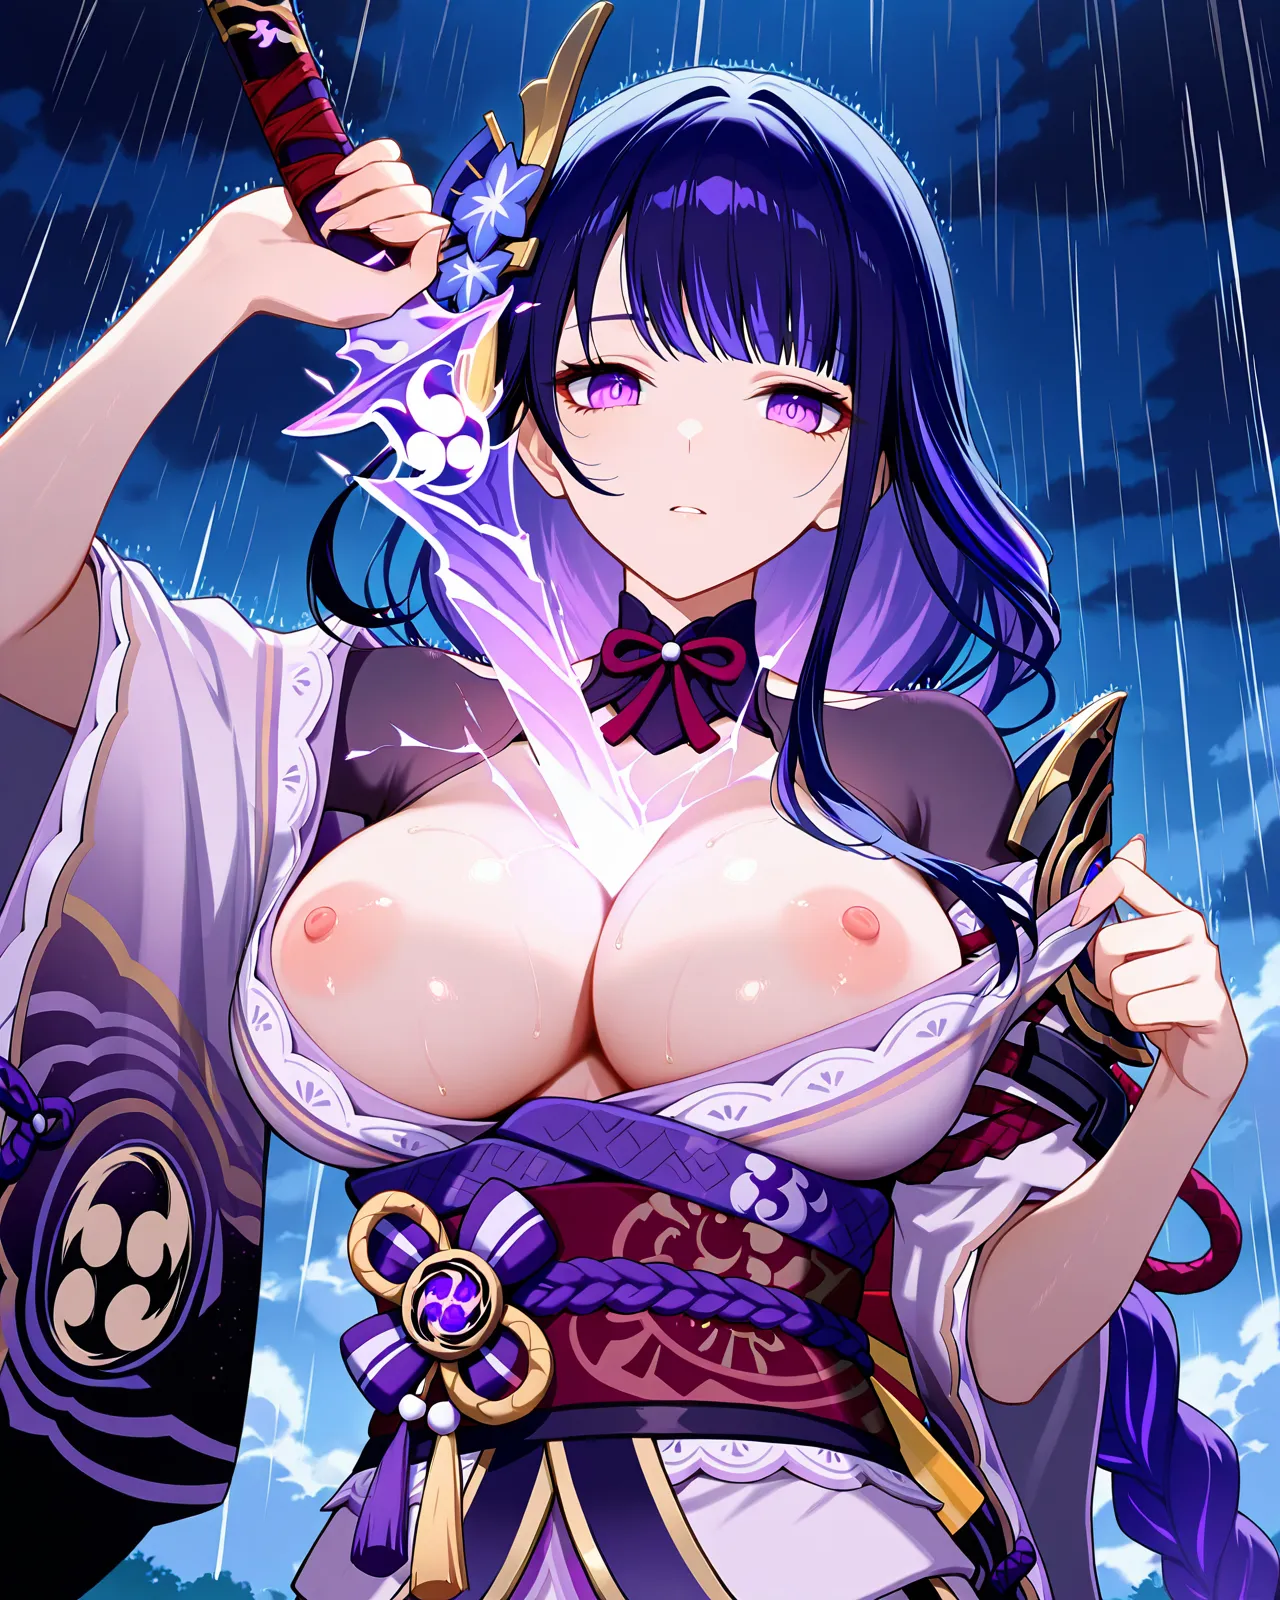
Check below how parentheses works.
An Advice
The AI can't do everything on its own, so some things might not work as expected. Don't give up, if you're still struggling, ask on Discord how to get closer to what you want. If it's completely impossible, I can try to add it for you.
To check more prompt examples or if you need help, join the Discord Server
Tag Examples
These are common tags but it's not limited to them:
Body Types
slim body, average, curvy, muscular, chubby, athletic, etc
Hair Colors
blonde, brunette, black hair, red hair, blue hair, pink hair, purple hair, silver hair, etc
Expressions
smiling, blushing, surprised, seductive, shy, angry, happy, etc
Poses
standing, sitting, lying down, bent over, on knees, arms up, etc
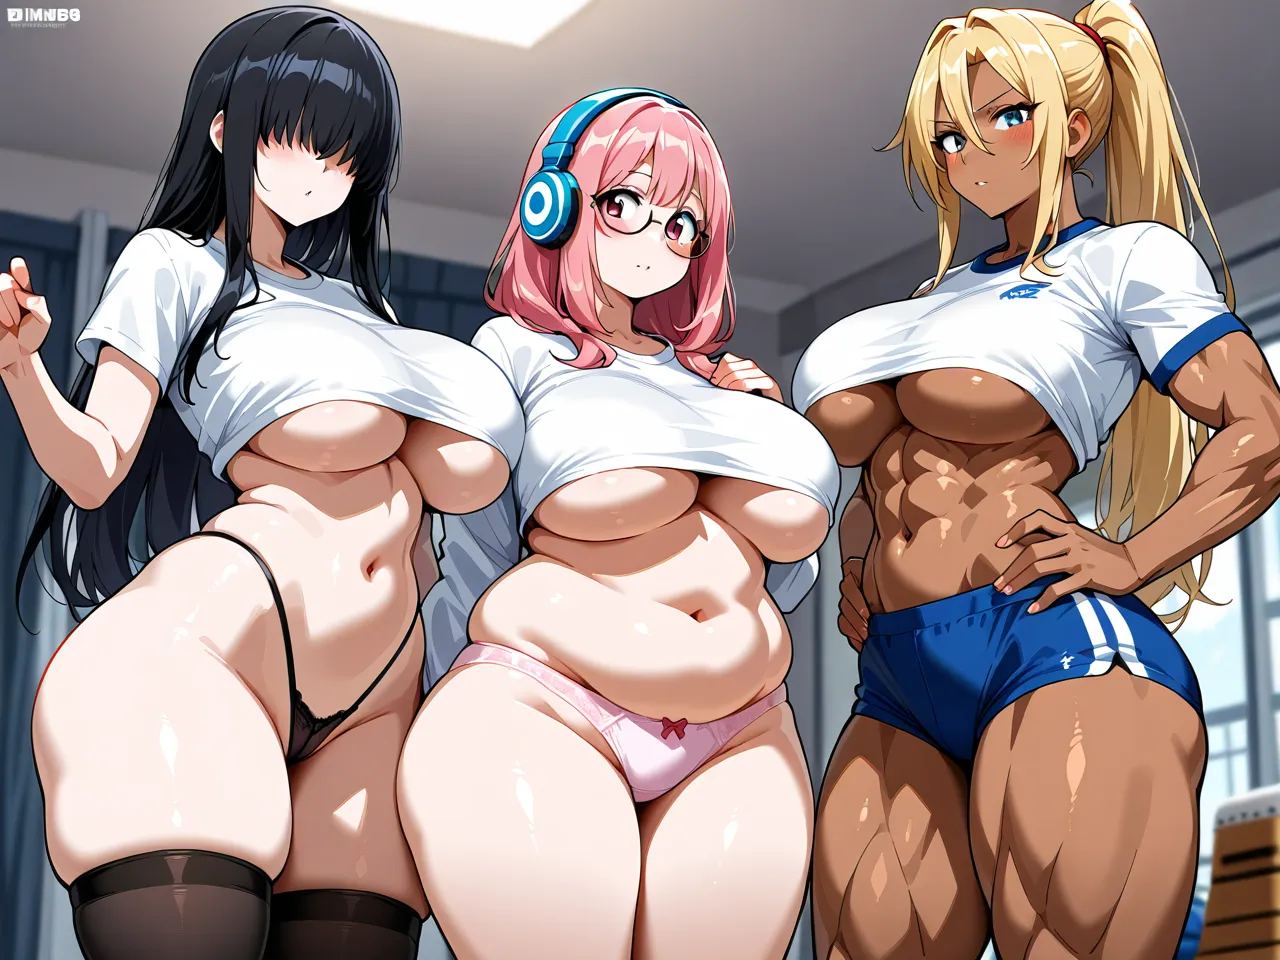
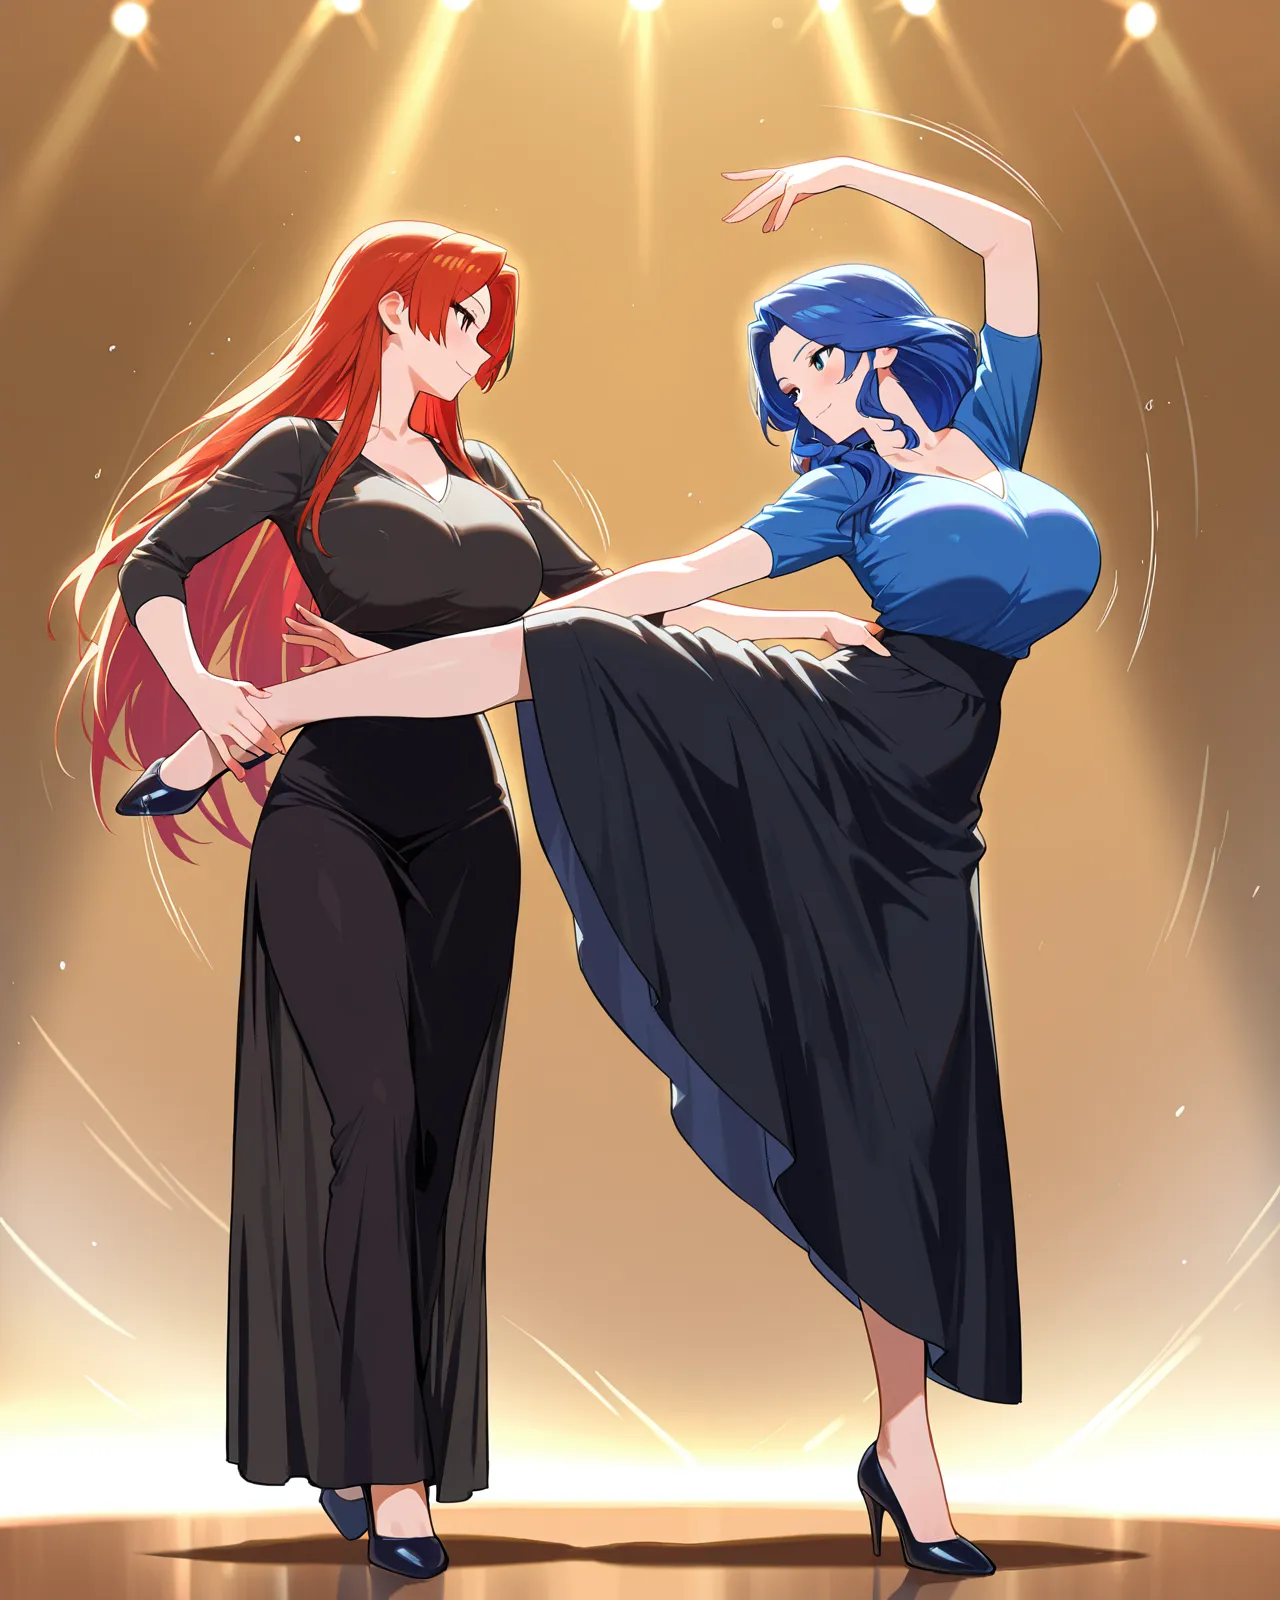
Image Settings
Size Selection
Choose the dimensions for your artwork. Common sizes:
- 512x512 - Standard square
- 768x512 - Wide format
- 512x768 - Portrait format
I recommend you to use sizes lower than 768 with "Upscale" or "Improve" activated, it have less deformities and better quality.
Style Selection
Choose an art style for your generation by clicking on it:
The chosen model affects the look of everything you generate, including image-to-image, sketches, masks and the other tools.
Tip: click and hold a style button to add it to your prompt as a special tag. You can mix several styles at once and add weights to control how strong each one is (e.g. plus:SuperMixEtheris:0.8).
Supporter Supporters get extra models, including Zenith, our newest and most capable model. Zenith understands natural language prompts and has smart auto-complete for artists, characters and shows. See the dedicated Zenith section below.
Sharpness Slider
Control how sharp and correct you want the image:
Fidelity Slider
Control how closely the AI follows your prompt:
Detail Slider
Control how many details you want in the image:
Mix Slider
Control how strong you want the style:
The default values are fine, but I recomend to test different values with different prompts and styles.
Advanced Features
Negative Prompt
You can control the AI to prevent something from appearing by using the negative prompt. For example, you need the image to be just a landscape, but it keeps getting you a character, you can write: "person, human, character", etc on negative to get rid of it.
Weight
To increase weights you can use parentheses (tag)
The more parenthesis you use, more emphasis a tag it will have. (((tag))) = 3x stronger
You can use numbers as well (tag:2.3) = 2.3x stronger
Obs: Close every one that you open or it will mess all your prompt; If you exagerate your weights the images will be distorted; If you dont want something to appear write it on negative, it works with weights as well; If something doesn't appear even after a strong weight, check if the tag is written correct, or maybe the AI can't do it.
Special Tags and Special Characters
Most concepts, styles and characters should work across the different styles just by describing, for example:
"Tsunade, Tsunade from naruto, large breasts, blonde hair, brown eyes, green coat"
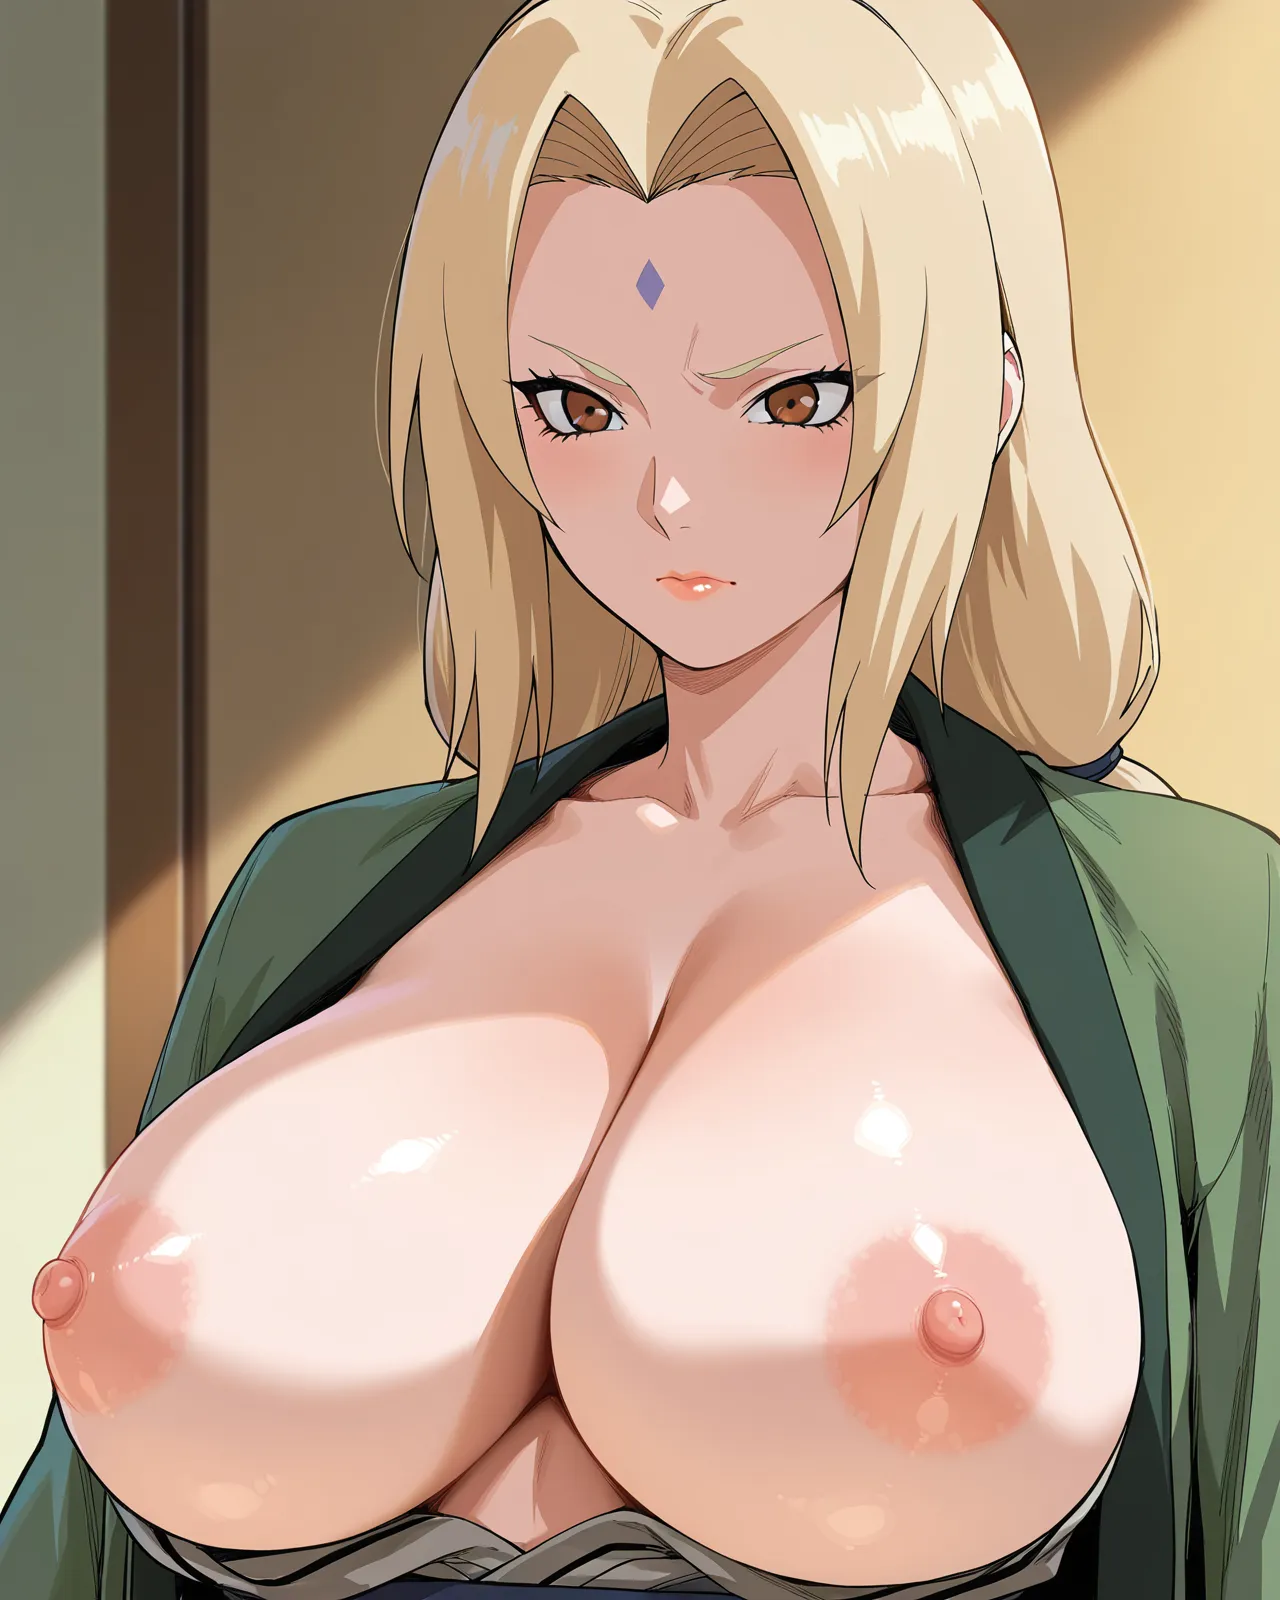
But sometimes the AI doesn't know these. That's why there is the Special Tags and Characters.
These are focused tags to guarantee that something will appear in the image. Click on it to show the list of available tags, hover your mouse over it to see a example on the right.
Format - plus:(concept/style)
Example - plus:SpiralEyes
Format - character:(name/origin)
Example - character:HatsuneMiku
They work better for Supporters, for the main page it is limited and sometimes won't work together properly.
Inventing plus: or character: tags won't work, if it is not on the list, you can try to describe the character or concept using it's name and traits with weights, like the Tsunade example. If nothing of it works, and there is no special tag for it, you can request on Discord.
Image Reference
Upload an image or provide a URL to guide the AI generation, THE LINK NEEDS TO BE A PUBLIC AND AVAILABLE IMAGE OR ELSE THE GENERATOR WON'T READ IT:
Or drag and drop an image file to upload, (uploading of questionable material may lead you to a restriction on this feature):
There are four reference modes in the Reference Tools menu: Image, Sketch, Mask and Sketch+Mask. Whatever you pick, always write a prompt, since the AI won't read all the context from the reference on its own.
Sketch Free
Sketch something and describe how it should look:
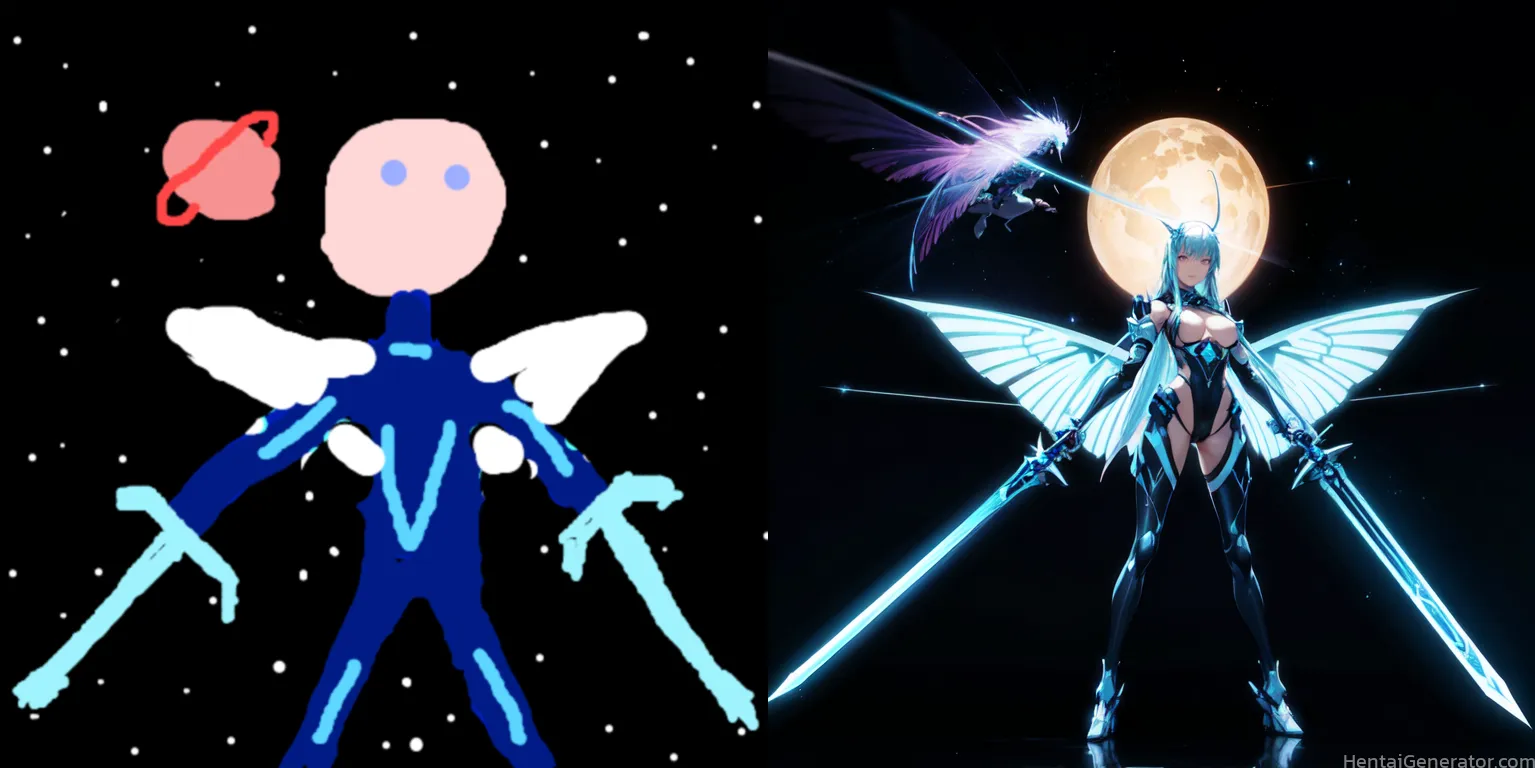
Obs: Make it with COLOR, reminding what you want, like a frame, just a scribble will be translated to a black and white scribble image (stick figures stay stick figures, so draw colored shapes representing what you want).
Mask Supporter
Draw over the part that you want to change; only the covered area is regenerated, the rest stays intact:
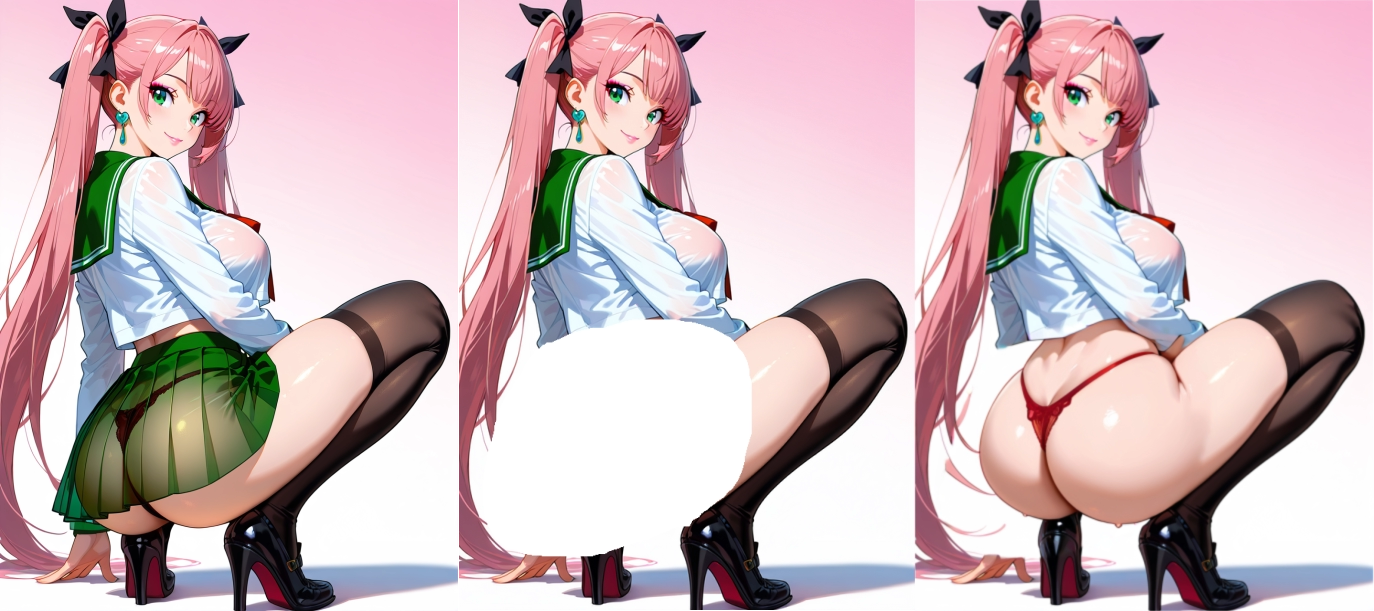
Write a prompt for it, like the example above:
(((no skirt, red panties, ass, big ass, naked ass, thong, naked))) /// Negative: (((skirt, green skirt, clothes)))
Sketch+Mask Supporter
A mix of both: the AI changes only the part you drew over, but it also takes into account what you drew there together with your prompt. Great for adding a new object or detail exactly where you want it.
Mask² & Sketch+Mask² Advanced Controls Supporter
On the Zenith model the mask tools get three extra sliders (each with an ON/OFF switch; turn it off to use the default behavior) for much cleaner, more controlled edits:
Mask Focus
Tells the AI to look only at a square area around your mask instead of the whole image, concentrating all the resolution there. Low = tight zoom, maximum detail on a small spot (a face, an eye, a hand); High = includes more surroundings so it blends in better.
Mask Sustain
How much of the original content under the mask is kept. Low = repaint freely (replace something completely); High = keep the original and apply only subtle touch-ups.
Mask Warp
How strong the change inside the mask is. Low = soft, gentle changes that blend smoothly; High = dramatic changes.
Tip: pair a high Mask Sustain with a low Mask Warp for delicate fixes, or the opposite for a full repaint.
Freedom Slider
Control how closely the AI follows your reference image. This controls Image, sketches and masks:
Example of levels of freedom. (Scroll to the right)

Prompt by Region
Write a prompt for each part individually:
Tip: If you want multiple characters, like 2 girls, write "2girls" on every prompt to enhance it. For best results, pair it with a reference image that already has the right colors in each place.
On Zenith the region tool works differently: instead of a grid, you paint areas of the canvas with different colors and write a separate prompt for each color. Also describe where things are in each prompt ("girl on the left", "tree in the background") and try not to overlap colors, since overlapping colors mix the prompts. A Weight slider biases how strongly the image leans toward a region. Note that Zenith's region tool is softer, since it prioritizes following the prompt over the exact painted boundaries.
Fix Face
Detects faces in an image and re-draws them to look better. Very useful for full-body or distant shots where the face often comes out distorted. You can also write a small prompt to guide how the face should look (e.g. "pretty face, blue eyes, blushing").
- Freedom controls how much the new face may differ from the original: low keeps it close, high lets the AI redraw it freely.
- The AI can't recognize faces that are too blurred or far away (there's a minimum quality), and it can occasionally have pareidolia (see faces where there aren't any).
3D Pose Supporter
The old pose maker was replaced by a full 3D Pose tool (available on the Zenith model). Open it and pose a 3D character in a draggable floating window, then use it as a pose reference for your generation:
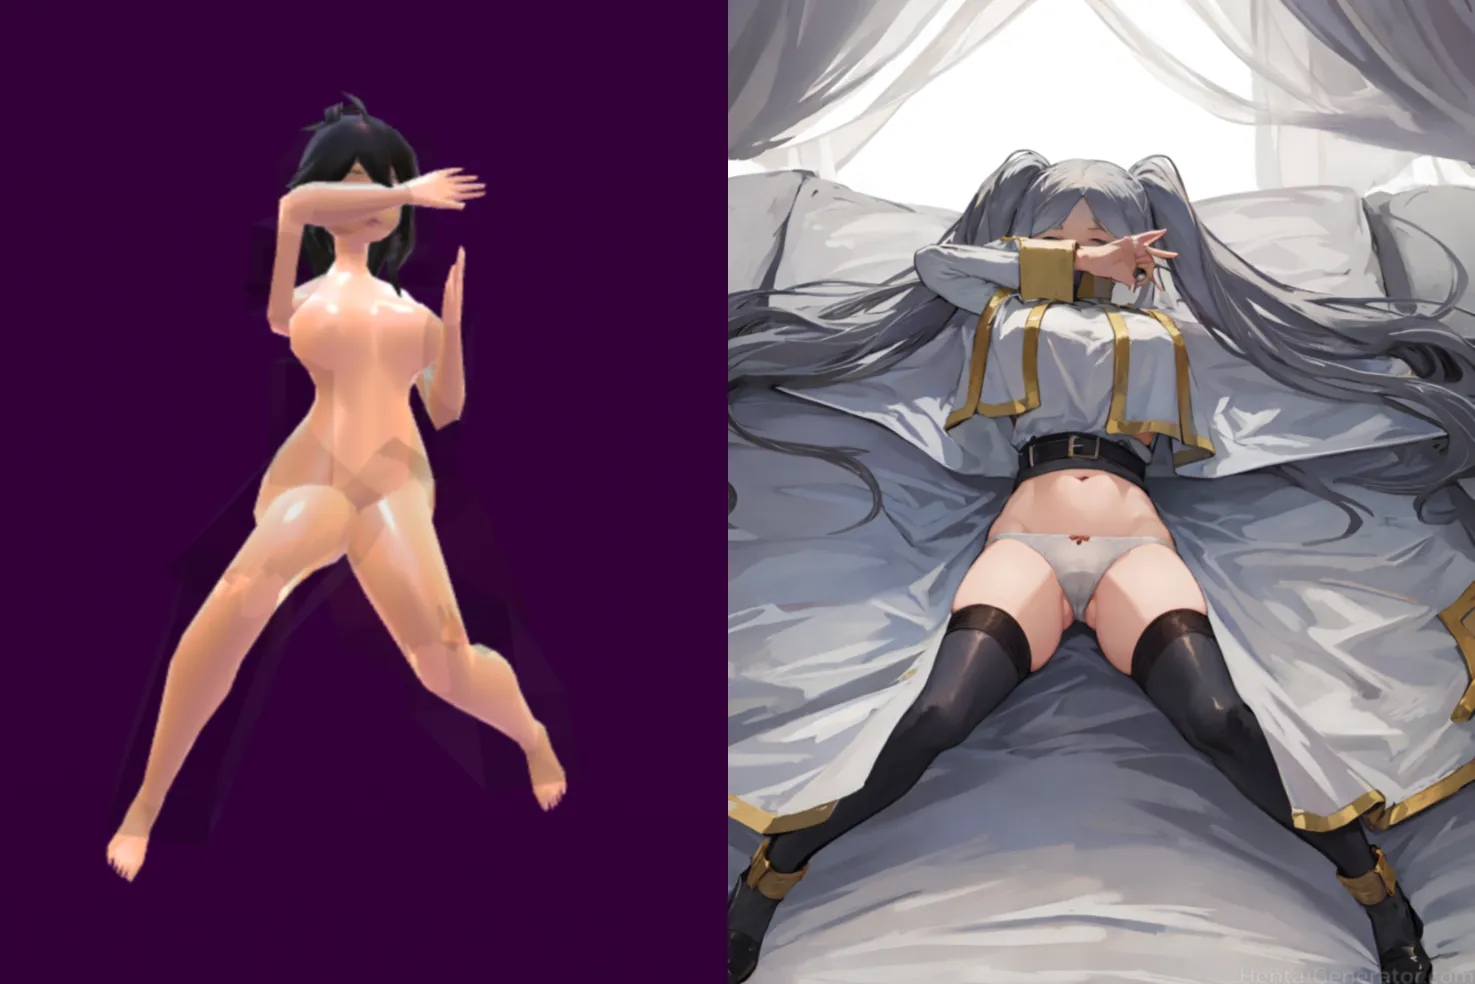
- Drag bones to pose the body, or use the IK handles: drag the hand or foot marker and the whole limb follows naturally.
- Mirror button copies a whole limb from one side to the other, great for symmetric poses.
- Ready-made hand gestures (fist, open hand, thumb out…) and full-body poses you can apply in one click and then tweak.
- The pose window is locked to the aspect ratio of the size you picked, so what you frame is what you generate.
- Pose Strength slider controls how strictly the AI follows the pose.
- Skeleton mode shows an OpenPose skeleton over the character; turn it on to send the skeleton (instead of the rendered figure) as the pose guide.
Pose your character, then generate; the pose is used as a reference alongside your prompt.
Some considerations:
The image ASPECT RATIO will follow the size that you choose not the image that you are using, if your image is 1:2 and you choose a size for 512x512 = 1:1, the generated image will squish the uploaded image to generate a new one.
Make sure that the image that you are linking is available for everyone to see, or else the generator won't be able to see it too.
Zenith: Natural Language & Smart Tags Supporter
Zenith is our newest and most capable model. Pick it from the model menu (it's unlocked for supporters). Everything you already learned still works, but Zenith adds a few big upgrades:
Natural Language Prompts
Zenith understands full sentences, not just tags. You can literally write "a shy girl with long silver hair sitting by a window while it rains outside, soft warm light" and it will understand the scene. You can still mix in tags and weights whenever you want more control, and the two styles work together.
Smart Auto-Complete: Artists, Characters & Shows
As you type, Zenith suggests matching artists, characters and shows/series from a huge database, so you don't have to guess the exact spelling:
- Start typing a show or character name and pick it from the list; it gets inserted in the correct, AI-friendly format automatically.
- Recognized tags glow in the prompt: characters, series and artists each get their own color so you can see at a glance what the AI understood.
- A toggle button at the top-right of the prompt box turns the suggestion lists on or off (your choice is remembered). The glows stay on either way.
This makes it far easier to nail a specific character or copy an artist's style without hunting for the right tag by hand.
Special Tags & Characters (the plus: and character: tags from the section above) also work on Zenith and are most reliable here, and supporters get the fullest access to them.
Zen Edit Supporter
Zen Edit lets you edit images by describing the change in plain language. Upload 1 to 3 images and tell the AI what to do with them.
Example:
- Image 1: a character
- Image 2: a piece of clothing
- Prompt: "the character from image 1 wearing the clothes from image 2"
Keep expectations realistic: Zen Edit runs on low-end hardware and is a weaker tool, so results can be imprecise, especially with complex edits or several images at once. Simple, clear instructions work best. Undressing/uncensoring can come out distorted on the NSFW parts.
Video Generation Supporter
Animate an image into a short video with a prompt. Select the Video tile and the interface simplifies to just a start-image slot, a prompt and a negative prompt.
How to use it
- Start from an image: you must upload or generate an image first. The video keeps that image's aspect ratio (at a small size / low resolution, since this server runs on modest hardware).
- Prompt like a director: describe the action. What are the hands doing? What is being exposed or covered? How hard is something gripped? The more specific the motion, the better the result.
- Length: each generation makes a ~3 second clip. To reach ~6 s, after it finishes open the options and click "Continue from last frame"; the last frame loads into the image slot and the next clip continues seamlessly. Change the prompt before continuing to shift the action mid-video.
Limits & cooldown
- Supporters: up to 2 videos every 25–30 minutes.
- Supporters ×3: up to 4 videos per cooldown window.
- A countdown timer on the video tile shows when you can generate again.
Video generation takes a long time to process, so be patient after starting one.
Generation Process
After clicking GENERATE, you'll enter a queue:
- Free users: 3 concurrent generations max
- Supporters: 8 concurrent generations max
- Supporters have priority in the queue
Typical generation time: 20s-3minutes depending on server load.
If your image doesn't appear after loading finishes, try clicking on:
or click 'Save' to download it directly.
If the image doesn't appear after a long time, it may be a error, you can @ me on Discord-"bug-reports" channel with the issue.
After Generating: Result Tools
Once an image is ready, a row of tools appears so you can save it or keep working on it without starting over. (Each button also has its own ⓘ help icon.)
Save / Download
Downloads the image (or opens it in a new tab). Always save what you like, because if you close it, it won't come back.
Post Processing
A side panel to touch up the image without regenerating: filters (brightness, contrast, saturation, blur, vignette…), manga speech/thought bubbles, custom text, shapes, and effects like speed/focus lines. Click "Export PNG" to save the edited result.
Transform
Sends the image to Image-to-Image at the top so you can write a new prompt and evolve it further.
Recycle
Makes a new variation using the same prompt, with this image set as the reference (Freedom 30) so it stays fairly close.
Send to Sketch
Sends the image to the Sketch tool so you can draw on top of it to guide the next generation.
Send to Mask
Sends the image to the Mask tool to repaint only a specific area you paint over.
Fix Face
Re-draws the face(s) to improve quality, especially handy for distant or full-body shots.
Crop and Redo
Draw a box on the image; that region is upscaled to full size and regenerated, great for zooming into and improving a detail. (For finer control, Image-to-Image can be better.)
Fill Sides
Extends the image outward (left/right/top/bottom) by 128/256/512px, painting the new area to match. For precise fills, try Sketch+Mask on an extended image.
Parallax Effect
Opens a tool that turns the image into a 3D parallax object you can rotate slightly for a sense of depth.
Local Upscale x2
Doubles the image resolution using an AI model that runs entirely in your browser (nothing is uploaded). Uses your CPU, so it may freeze the tab for a few minutes; the first run downloads the model.
Remove Background Supporter
Automatically removes the background, leaving the subject on a transparent area. It focuses mostly on people / the main subject, but isn't guaranteed on every image.
Frequently Asked Questions
Is this really free?
Yes! Generate unlimited images without paying. Supporters get extra features but basic generation is completely free.
Why are my images low quality and too deformed?
Try using the "Upscale" or "Improve" option, be more specific in your prompts, and experiment with different styles and values.
Why can't I create images like the ones that you post?
You can, check on Discord for examples, there is a bot to describe images in there as well, you can use it. If you still can't reproduce something you saw, ask me, I'll be glad to answer how it's done. (If I don't forget)
Which tools need a supporter account?
Basic generation, Sketch and Upload/URL are free. The Zenith model, Video, Zen Edit, 3D Pose, Mask / Sketch+Mask and Remove Background are supporter-only, and they show a golden "Supporter" ribbon on the main page.
Can I request new features?
Yes! Join the Discord server to suggest improvements.
The queue isn't moving
This means the server needs attention. Ping @HentaiGenerator on Discord so I can fix it.
Support Hentai Generator
Your support helps keep this site running and improves it for everyone!
Supporter Benefits
- No ads
- No watermarks
- Priority queue
- More concurrent generations (8 vs 3)
- Early access to new features
- Priority to request characters/concepts
Supporter-Only Tools
- Zenith model: natural language + smart artist/character/show tags
- Video generation
- Zen Edit: edit images by describing the change
- 3D Pose tool
- Mask & Sketch+Mask (plus the advanced Mask² controls)
- Remove Background
- Fullest access to Special Tags & Characters